
Turn Your Garage Door Smart: What to Know Before You Start
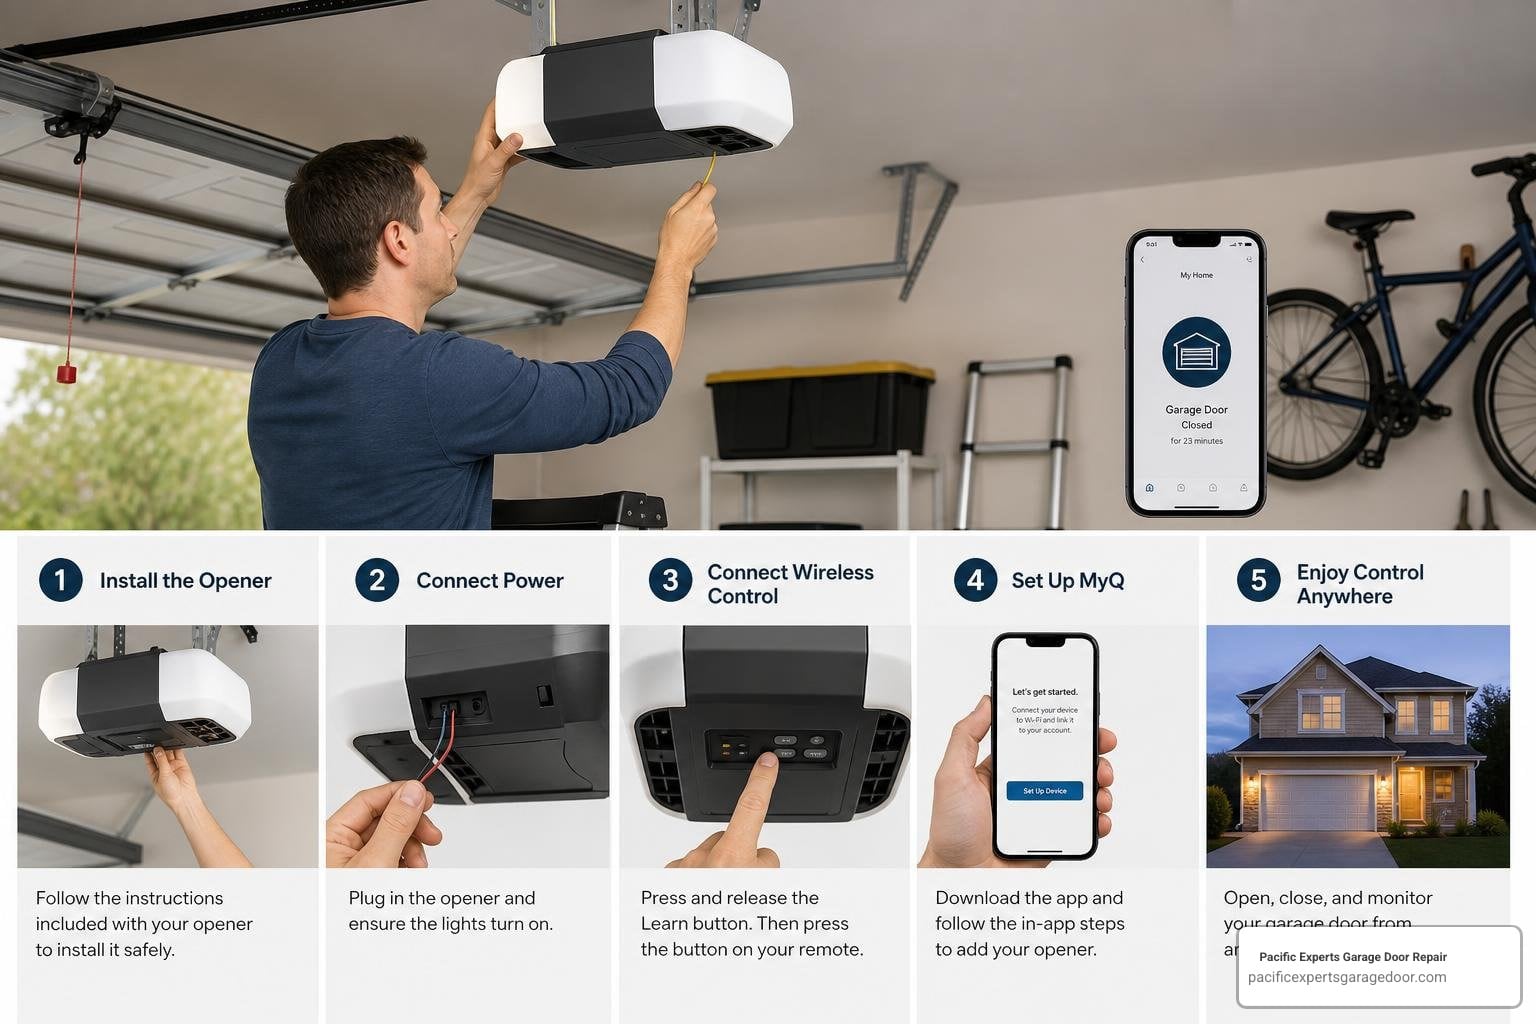
Chamberlain garage door myQ setup lets you control and monitor your garage door from anywhere using your smartphone. Here’s a quick overview of how it works:
- Check compatibility — Confirm your opener has built-in Wi-Fi or get a myQ Smart Garage Hub for older models.
- Download the myQ app — Available on the App Store and Google Play.
- Connect to Wi-Fi — Your opener or hub needs a 2.4 GHz Wi-Fi network.
- Pair in the app — Follow the in-app steps to link your opener via Bluetooth, then complete the Wi-Fi connection.
- Test the door — Open and close remotely to confirm everything works.
The whole process typically takes 30–45 minutes.
Your garage door is one of the main entry points to your home. Being able to check whether it’s open or closed — from your phone, from anywhere — is a real convenience and a security win.
The myQ app has been downloaded over 10 million times on Google Play alone, and it holds a 4.8 out of 5 rating from over 2.4 million users on the Apple App Store. That’s a strong sign that, when set up correctly, the system just works.
But getting there isn’t always obvious. The process looks different depending on whether your opener already has built-in Wi-Fi, or whether you need a separate hub. And small mistakes — like using the wrong Wi-Fi band — can stall the whole setup.
This guide walks you through every step clearly, so you’re not guessing.
I’m Mark Dahan, and through years of hands-on experience in the garage door industry, I’ve helped countless homeowners navigate the Chamberlain garage door myQ setup process — from straightforward Wi-Fi openers to more involved hub installations on older units. Let’s get your garage working smarter.
Chamberlain Garage Door myQ Setup Compatibility and Requirements
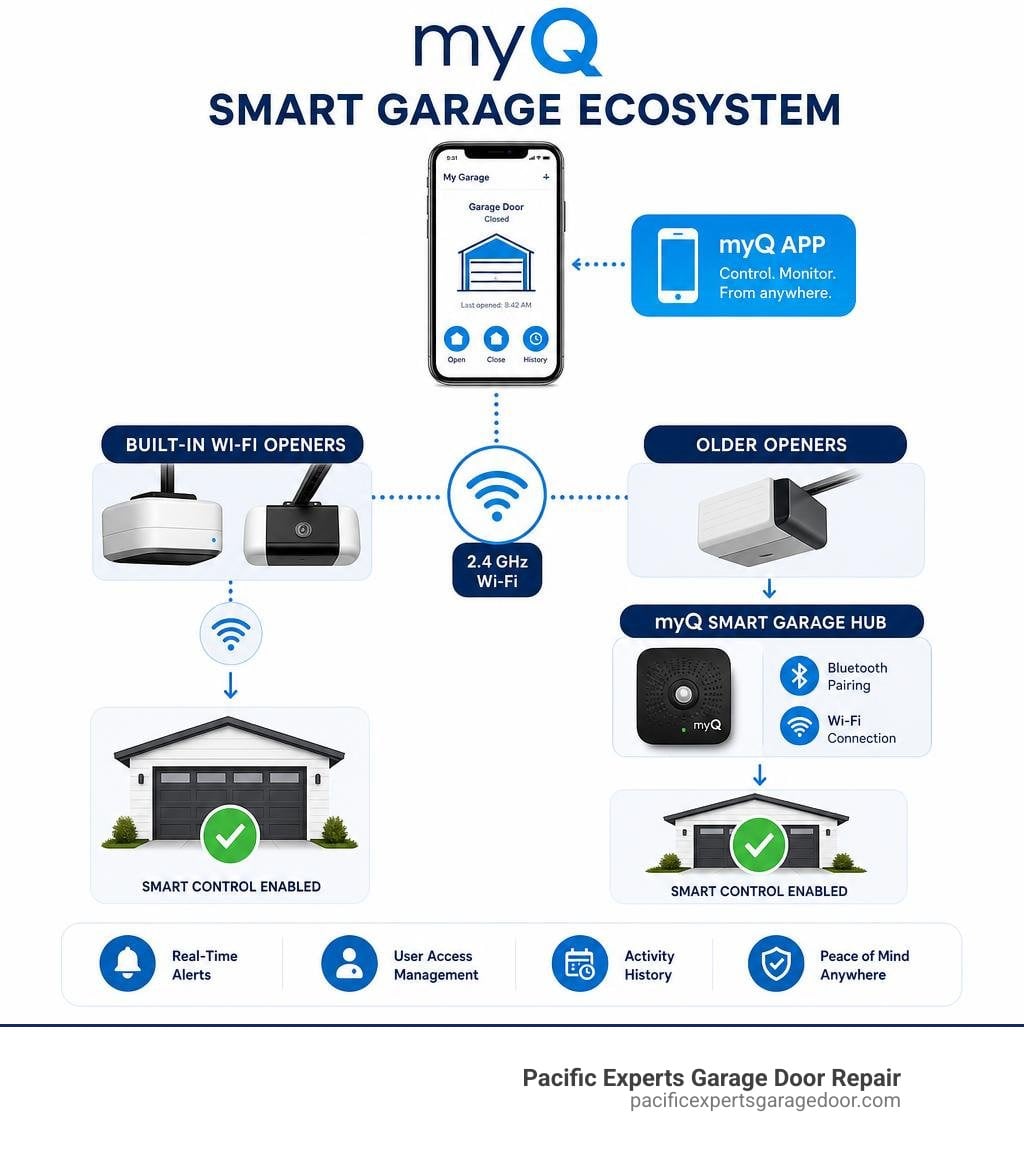
Before you climb up on a ladder or start entering your Wi-Fi password, we need to make sure your garage door opener is actually compatible with the myQ system. Not every Chamberlain opener is born with smart capabilities, but almost all modern ones can be retrofitted.
Understanding what kind of system you have determines whether you can connect directly to your home network or if you need to purchase an external bridge or hub. When exploring the best types of garage door openers, built-in smart functionality is now a standard feature on premium models, while older, heavy-duty chain or belt drives require a little hardware boost.
To help you visualize the path forward, here is a quick comparison of the two setup routes:
| Feature | Built-In Wi-Fi Opener | Smart Garage Hub / Control |
|---|---|---|
| Opener Requirement | Must have “Powered by myQ” & Wi-Fi logo | Manufactured after 1993 with safety sensors |
| Extra Hardware | None | Smart Hub + Wireless Door Sensor |
| Connection Method | Direct Bluetooth to Wi-Fi via App | Hub acts as bridge between Opener & Wi-Fi |
| Max Doors Controlled | 1 Door per opener unit | Up to 2 Doors (requires second sensor) |
| Setup Time | 15–20 minutes | 30–45 minutes |
Checking Your Opener for Wi-Fi Capability
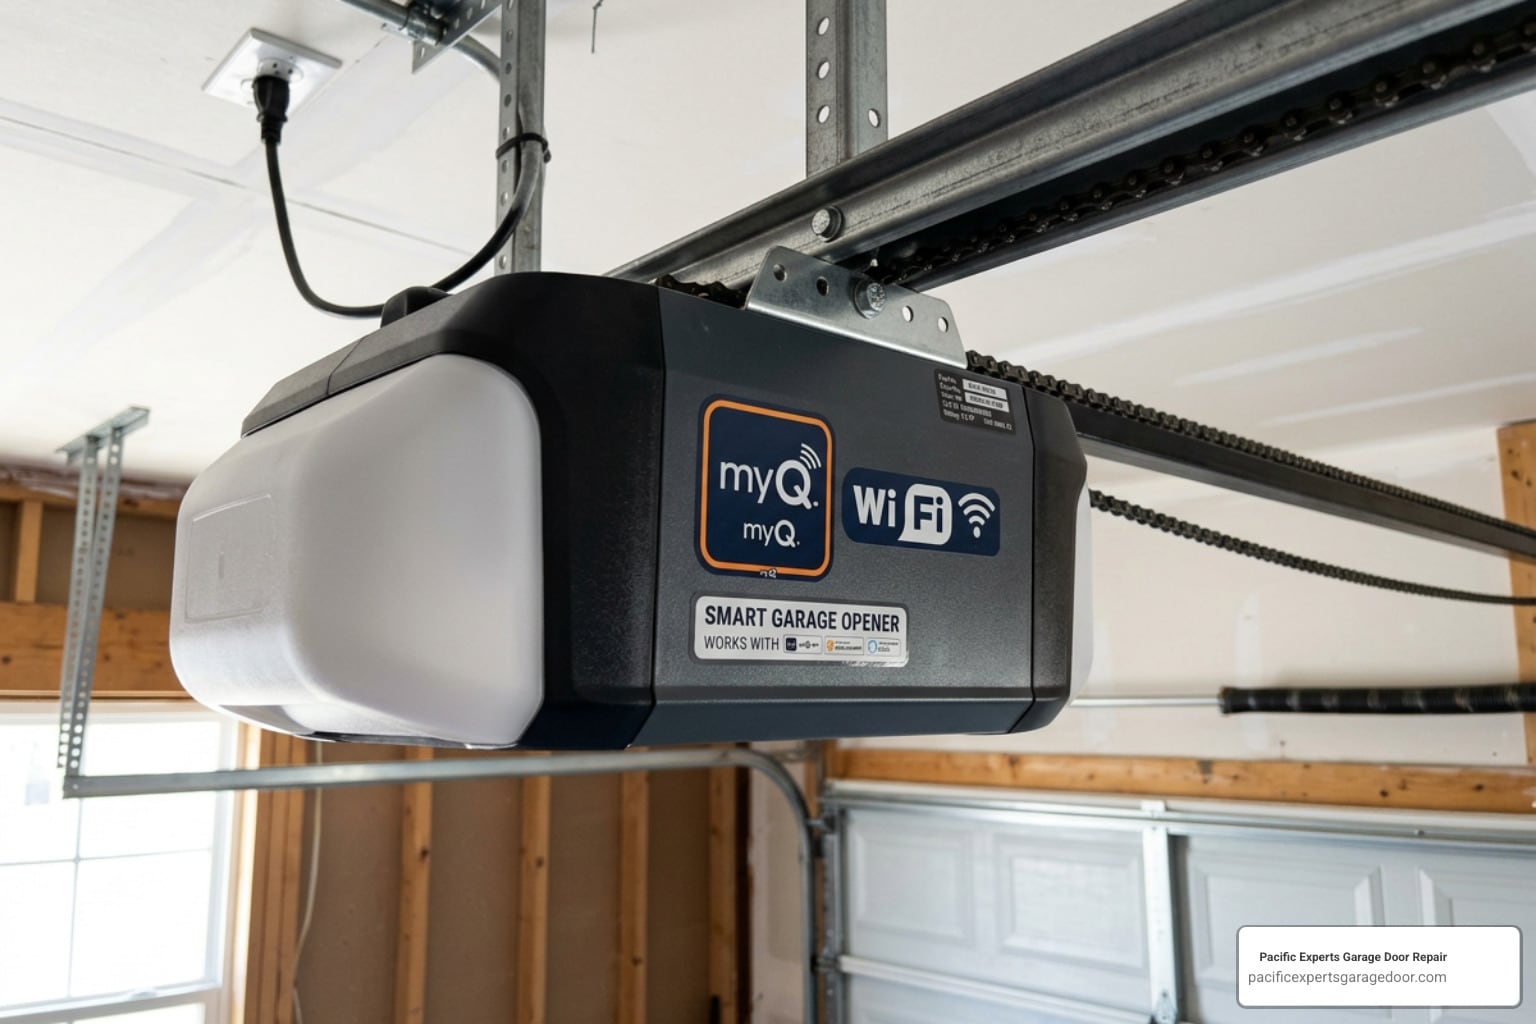
To check if your Chamberlain opener has built-in Wi-Fi, take a look at the motor unit hanging from your garage ceiling. You are looking for specific logos:
- Wi-Fi Symbol + “Powered by myQ”: If you see both the Wi-Fi icon and the myQ logo printed directly on the plastic housing, congratulations! Your opener is Wi-Fi enabled. You do not need any extra hubs or sensors to get online.
- myQ Logo Only (No Wi-Fi Symbol): If you see the myQ logo but no Wi-Fi icon, your opener has internal smart radio technology but cannot talk directly to your home router. You will need a myQ Internet Gateway or a Smart Garage Control hub to bridge the gap.
- No Logos (Older Models): If your opener was manufactured after 1993 and features infrared safety sensors (the little light-beam eyes at the bottom of your door tracks), it is still highly compatible! You can easily upgrade it using a retrofitted smart hub.
Essential Equipment for Chamberlain Garage Door myQ Setup
To complete your Chamberlain garage door myQ setup smoothly, gather these essential items before you begin:
- A compatible smartphone: Your phone must run a relatively modern operating system (iOS 16.0 or later for Apple devices, or modern Android builds).
- A strong Wi-Fi signal in the garage: If your smartphone has fewer than two bars of Wi-Fi when you stand directly beneath your garage door opener, the connection may fail or drop frequently.
- A sturdy ladder: You will need to reach the side or back panel of your opener to access the “Learn” button.
- Safety first: Keep children and pets clear of the garage door during this process, as the door will move during the testing phase. For detailed hardware specifications, you can consult the official Chamberlain Smart Garage Control Manual.
Preparing Your Network and Mobile Device
The single most common reason a smart garage setup fails on the first try is network frequency. The myQ system operates exclusively on the 2.4 GHz Wi-Fi band.
Many modern home routers are “dual-band,” meaning they broadcast both 2.4 GHz and 5 GHz networks under a single name. During setup, your phone might latch onto the faster 5 GHz band, leaving the myQ device unable to communicate with it.
To prevent this:
- Temporarily disable the 5 GHz band in your router settings, or make sure your phone is explicitly connected to your router’s 2.4 GHz channel.
- Ensure your router is located within 50 feet of the garage opener or hub. Brick walls, metal siding, and heavy garage doors degrade signal strength rapidly.
- Turn ON your phone’s Bluetooth.
- Turn OFF your mobile/cellular data temporarily during the initial pairing process. Phones often try to jump back to cellular data when they detect a local Wi-Fi network without active internet access, which disrupts the setup flow.
Step-by-Step Chamberlain Garage Door myQ Setup Guide
If your Chamberlain garage door opener has built-in Wi-Fi, you are ready to connect it directly to your home network.
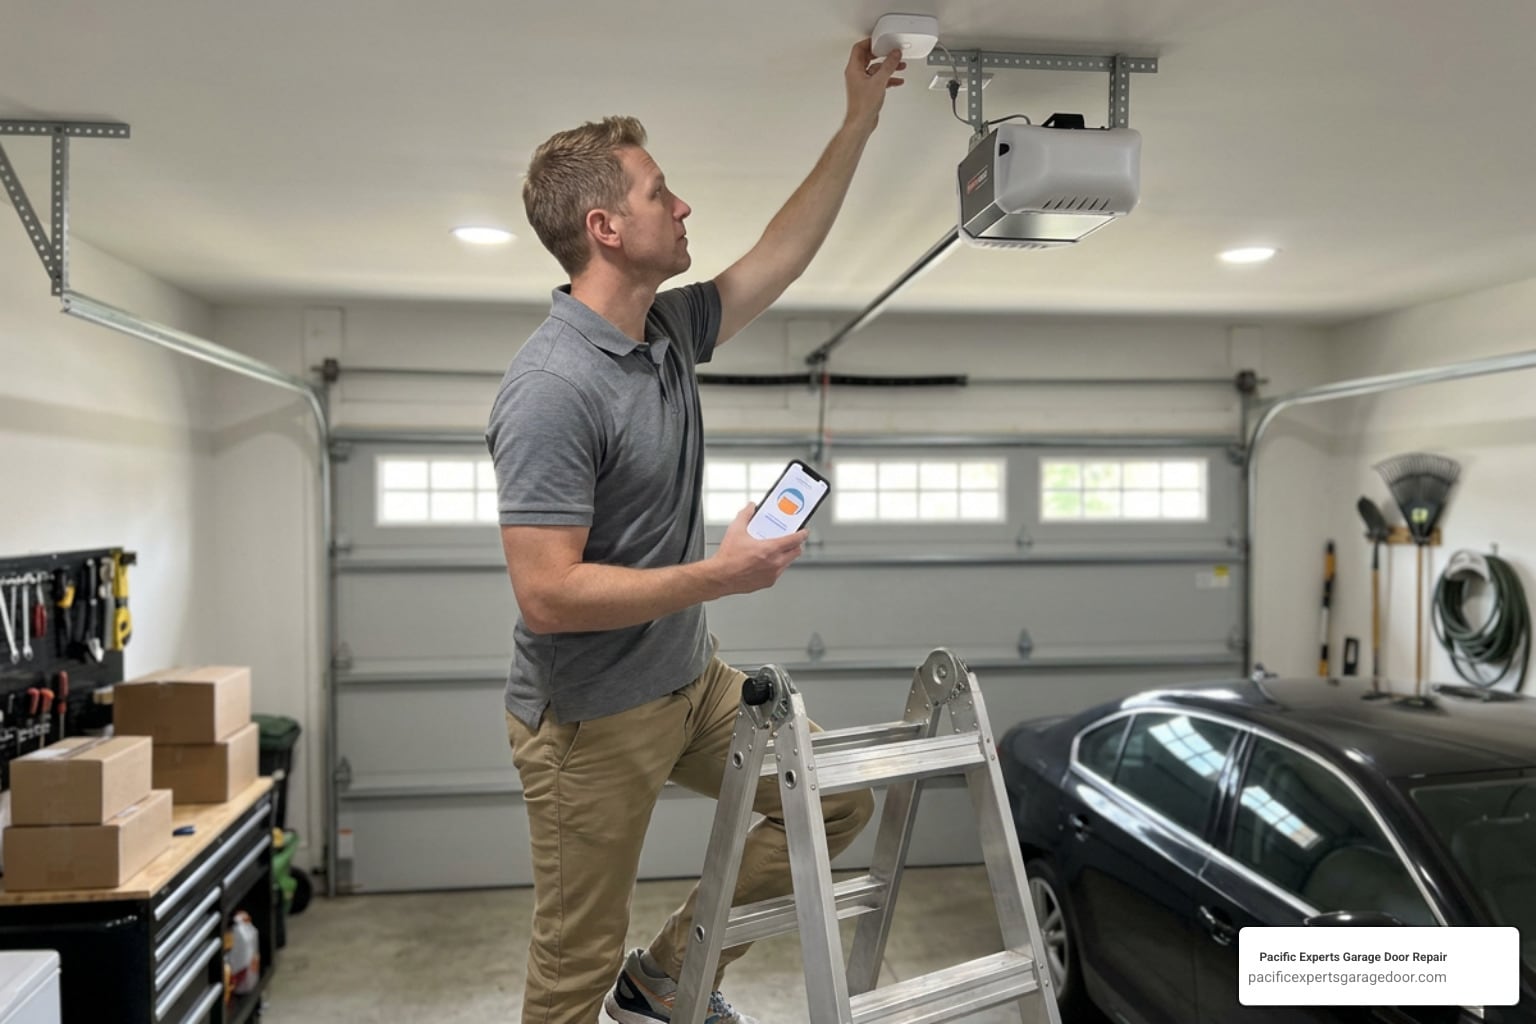
By following the official Chamberlain Wi-Fi Setup Guide, you can link your physical opener to the digital cloud in just a few straightforward steps.
Step 1: Download the myQ App and Sign In
First, open the App Store on your iPhone or Google Play on your Android device. Search for “myQ Garage & Access Control” and download the app. That the iOS version is a hefty 358.6 MB, so downloading it over Wi-Fi is highly recommended.
Once installed, open the app. If you are a new user, tap Sign Up to create an account. You will need to enter your email address, choose a secure password, and verify your email by clicking the confirmation link sent to your inbox. Once verified, log back into the app.
Step 2: Put Your Opener into Learn Mode
To allow the app to discover your garage door opener, you need to put the physical motor unit into “Learn Mode.”
- Grab your ladder and locate the control panel on the side or back of the opener. You may need to open a light cover to see it.
- Look for the colored Learn Button (usually yellow, purple, red, or orange).
- Press and release the Learn Button quickly (do not hold it down, as holding it down for more than 6 seconds will erase all your paired remote controls and keyless entry pads!).
- Alternatively, if you have a smart wall control panel inside your garage, you can often enter Learn Mode through its menu screen without climbing a ladder. For more context on how these programming buttons interact with traditional accessories, check out our guide on how to program a clicker garage door opener.
- When the opener successfully enters Learn Mode, you will typically hear a beep, and the main overhead light bulb may flash.
Step 3: Complete the Chamberlain Garage Door myQ Setup in the App
With your opener waiting in Learn Mode, return to the myQ app on your smartphone:
- Tap the + icon or the gear icon on the main dashboard to add a new device.
- Select Garage Door Opener from the list of device types.
- Choose Wi-Fi Garage Door Opener when prompted.
- The app will use Bluetooth to scan for nearby Chamberlain units. Once it detects your opener, select it.
- Choose your home 2.4 GHz Wi-Fi network from the list of available networks displayed on your screen.
- Carefully type in your Wi-Fi password.
- Tap Connect. The opener’s internal Wi-Fi card will begin negotiating with your router. This process can take up to two minutes. You will hear a series of beeps from the motor unit, and the light will flash when the connection is successful.
- Give your garage door a clear, recognizable name (like “Main Garage” or “Left Bay”).
- Run a test cycle by tapping the large garage door icon on your app screen. The door should respond immediately, flashing its lights and beeping as a safety warning before closing.
Setting Up myQ with a Smart Garage Hub or Control
If your Chamberlain garage door opener does not have built-in Wi-Fi, don’t worry. You don’t need to replace your entire opener system. By using a Chamberlain Smart Garage Hub or Smart Garage Control, you can turn almost any post-1993 opener into a smart device.
This retrofit setup involves mounting a central hub on your ceiling and attaching a small wireless sensor to the door itself. For complete step-by-step physical installation details, refer to the Smart Garage Hub Setup Instructions.
Installing the Door Sensor and Hub
The smart hub works by communicating wirelessly with a battery-powered door sensor. This sensor tells the hub whether your garage door is physically open (horizontal) or closed (vertical).
- Prepare the Door Sensor: Remove the pull tab from the door sensor to activate its pre-installed CR2450 coin-cell battery.
- Mount the Sensor: Clean an area on the top panel of your sectional garage door. Mount the sensor vertically using the provided double-sided adhesive strips or mounting screws, ensuring the “myQ” lettering or “TOP” arrow is right-side up. Using screws is highly recommended in regions with extreme seasonal temperature swings, as adhesive can dry out and fail.
- Position the Hub: Plug the Smart Garage Hub into an AC outlet near your garage door opener. It should be mounted on the ceiling, at least 4 to 6 feet away from the main motor unit, and in a spot where its flashing warning light is clearly visible from the garage doorway.
- Post the Warning Placard: Always mount the physical warning placard on the wall right next to your standard wall control button. This alerts anyone in the garage that the door may be operated remotely.
Pairing the Hub to Your Existing Opener
Once the physical installation is complete, it is time to link the hub to your garage door opener:
- Open the myQ app, select Add Device, and choose Smart Garage Control or Smart Garage Hub.
- Connect the hub to your 2.4 GHz Wi-Fi network by following the in-app prompts.
- Pair the door sensor to the hub by pressing the test button on the sensor; the hub will beep to confirm it recognizes the sensor.
- Select your garage door opener’s brand (Chamberlain) and identify the color of your opener’s Learn button.
- When prompted by the app, press and release the Learn button on your garage door opener.
- The hub will attempt to send a radio signal to your opener. If successful, your garage door will begin to move. Confirm the movement in the app, and your pairing is complete!
Note: This universal hub setup is only designed for standard sectional garage doors with active safety reversal sensors. It must never be used on one-piece or swinging garage doors.
Troubleshooting and LED Status Indicators
Even with the best preparation, smart home tech can occasionally throw a curveball. Fortunately, Chamberlain has built a very smart diagnostic tool right into their Wi-Fi chips: the LED status light.
Whether you are configuring a brand-new opener or trying to figure out why your system suddenly went offline, reading these lights will tell you exactly what is wrong.
Understanding the LED Light Status Guide
Locate the small LED indicator light on your Wi-Fi opener’s motor unit or your Smart Garage Hub. Compare its behavior to this quick diagnostic guide:
- Blinking Blue: The device is in learn/setup mode and is actively broadcasting its own local network, waiting for you to connect your smartphone.
- Solid Blue: Your smartphone is successfully connected to the myQ device’s local network, and the app-based setup is currently active.
- Blinking Green: The device is actively trying to connect to your home router and retrieve an IP address.
- Solid Green: Success! The device is fully connected to your home Wi-Fi network and has established a secure link to the myQ servers.
- Blinking Blue and Green: The device cannot establish communication with your router. Double-check your Wi-Fi password or try moving your router closer to the garage.
- Blinking Green and Yellow: The device is in accessory programming mode.
How to Reconnect After a Wi-Fi Password Change
If you get a new router, change your internet service provider, or update your Wi-Fi password, your myQ device will lose its connection and show up as “Offline” in your app. To fix this:
- You do not need to delete the device from your app or start from scratch.
- Go to the myQ app, tap your profile icon, and select Device Setup.
- Choose Change Wi-Fi Settings and select your offline device.
- Put your opener back into Learn Mode (the LED should start blinking blue).
- Follow the app prompts to select your new network name and enter your new password.
- Ensure your router’s firewall is not blocking TCP/UDP ports 8883 and 53, which myQ uses to maintain its secure cloud connection.
Performing a Soft vs. Factory Reset
If your setup hangs indefinitely, or if you bought a home with an existing myQ opener that is still linked to the previous owner’s account, you will need to perform a reset.
- Soft Reset (Power Cycle): Unplug your Smart Garage Hub or turn off the breaker to your garage door opener for 30 seconds, then restore power. This clears temporary memory glitches without deleting your settings.
- Factory Reset (For Openers): Press and hold the yellow/colored Learn button on your opener motor unit for about 6 seconds until the indicator light goes out. This erases all remote controls, keypads, and Wi-Fi settings.
- Factory Reset (For Hubs): Press and hold the settings gear button on your Smart Garage Hub until the blue LED starts blinking. Release, then press and hold the button again until the hub emits a loud beep. This clears all Wi-Fi credentials and paired door sensors, allowing you to start fresh.
Frequently Asked Questions about myQ Setup
What is the difference between the iOS and Android myQ setup flows?
While the core steps are identical, the myQ app behaves slightly differently depending on your phone’s operating system:
- iOS (Apple): Apple’s strict privacy controls require you to explicitly grant the myQ app permission to use Bluetooth and local network access during setup. Additionally, iOS users may need to manually open their Wi-Fi settings to select the “myQ-XXX” network if the automated handoff fails.
- Android: Android devices are generally more automated during local network handoffs. However, you must ensure that Location Services are turned ON and set to “High Accuracy,” as Android utilizes local Wi-Fi scanning to locate smart home devices.
Why is my myQ device showing as offline in the app?
If your app displays a “Device Offline” message, it means the connection between your hub/opener and the myQ cloud server has broken. The most common causes are:
- Weak Wi-Fi Signal: Metal garage doors and wall insulation can block Wi-Fi signals. Consider installing a Wi-Fi range extender halfway between your router and the garage.
- IP Conflicts: Sometimes routers assign conflicting local IP addresses. Power-cycling your router and then your myQ hub usually resolves this.
- Router Firmware Updates: If your router recently updated, it may have re-enabled the 5 GHz band under a combined SSID, causing the 2.4 GHz-only myQ chip to drop connection.
Do I need a paid subscription to use myQ’s core features?
No! The core features of the myQ app are completely free. You do not need a subscription to:
- Open or close your garage door remotely.
- Receive real-time push notifications when your door opens, closes, or is left open.
- Set custom schedules (e.g., automatically closing the door every night at 10:00 PM).
- Share access with family members via the “Co-Owner” feature.
Paid subscription plans (starting around $4/month or $40/year) are only required if you integrate the app with specific third-party camera storage services (like myQ Smart Video Storage) or smart vehicle infotainment systems.
Conclusion
Upgrading your home with a smart garage setup brings incredible peace of mind. No more driving back down the street to double-check if you closed the door, and no more worrying about missed package deliveries while you’re at work.
While the Chamberlain garage door myQ setup is designed to be a DIY-friendly project, dealing with ladders, wiring, and temperamental Wi-Fi signals in a dusty garage isn’t everyone’s idea of a fun weekend.
If you run into trouble, or if you would rather have an expert handle the installation from start to finish, we are here to help. At Pacific Experts Garage Door Repair, we provide fast, professional, and reliable garage door solutions across the entire Las Vegas valley. Whether you need a comprehensive garage door opener installation services package, a routine Services: Garage Door Opener Inspection to make sure your safety sensors are aligned, or targeted local support, our certified technicians have you covered.
We proudly serve homeowners throughout our local Nevada communities, including:
- Las Vegas garage door opener installation
- Henderson Garage Door Opener Installation
- North Las Vegas Garage Door Opener Installation
- Summerlin Garage Door Opener Installation
- As well as Boulder City, Centennial Hills, Enterprise, Green Valley, Pahrump, Paradise, Spring Valley, Sun City, and Winchester.
Ready to make your smart home transition completely stress-free? Contact us today to schedule your professional smart opener installation or tune-up!
